
Custom statuses, student self-marking, and attendance takers
MarkTrack's attendance bends to how your school actually runs. This guide covers the three per-school options that make that possible — custom statuses, student self-marking, and student attendance takers — plus the who-marked-it provenance that keeps every non-staff mark visible and correctable. Everything below is set per school and takes effect immediately.
Where these settings live
Go to Settings → Attendance and find the School Attendance Setup card. Each school is a collapsible row — click a school's name to expand it (one school is open at a time). You need admin access to change settings; teachers use the features once enabled.
The per-school setup panel
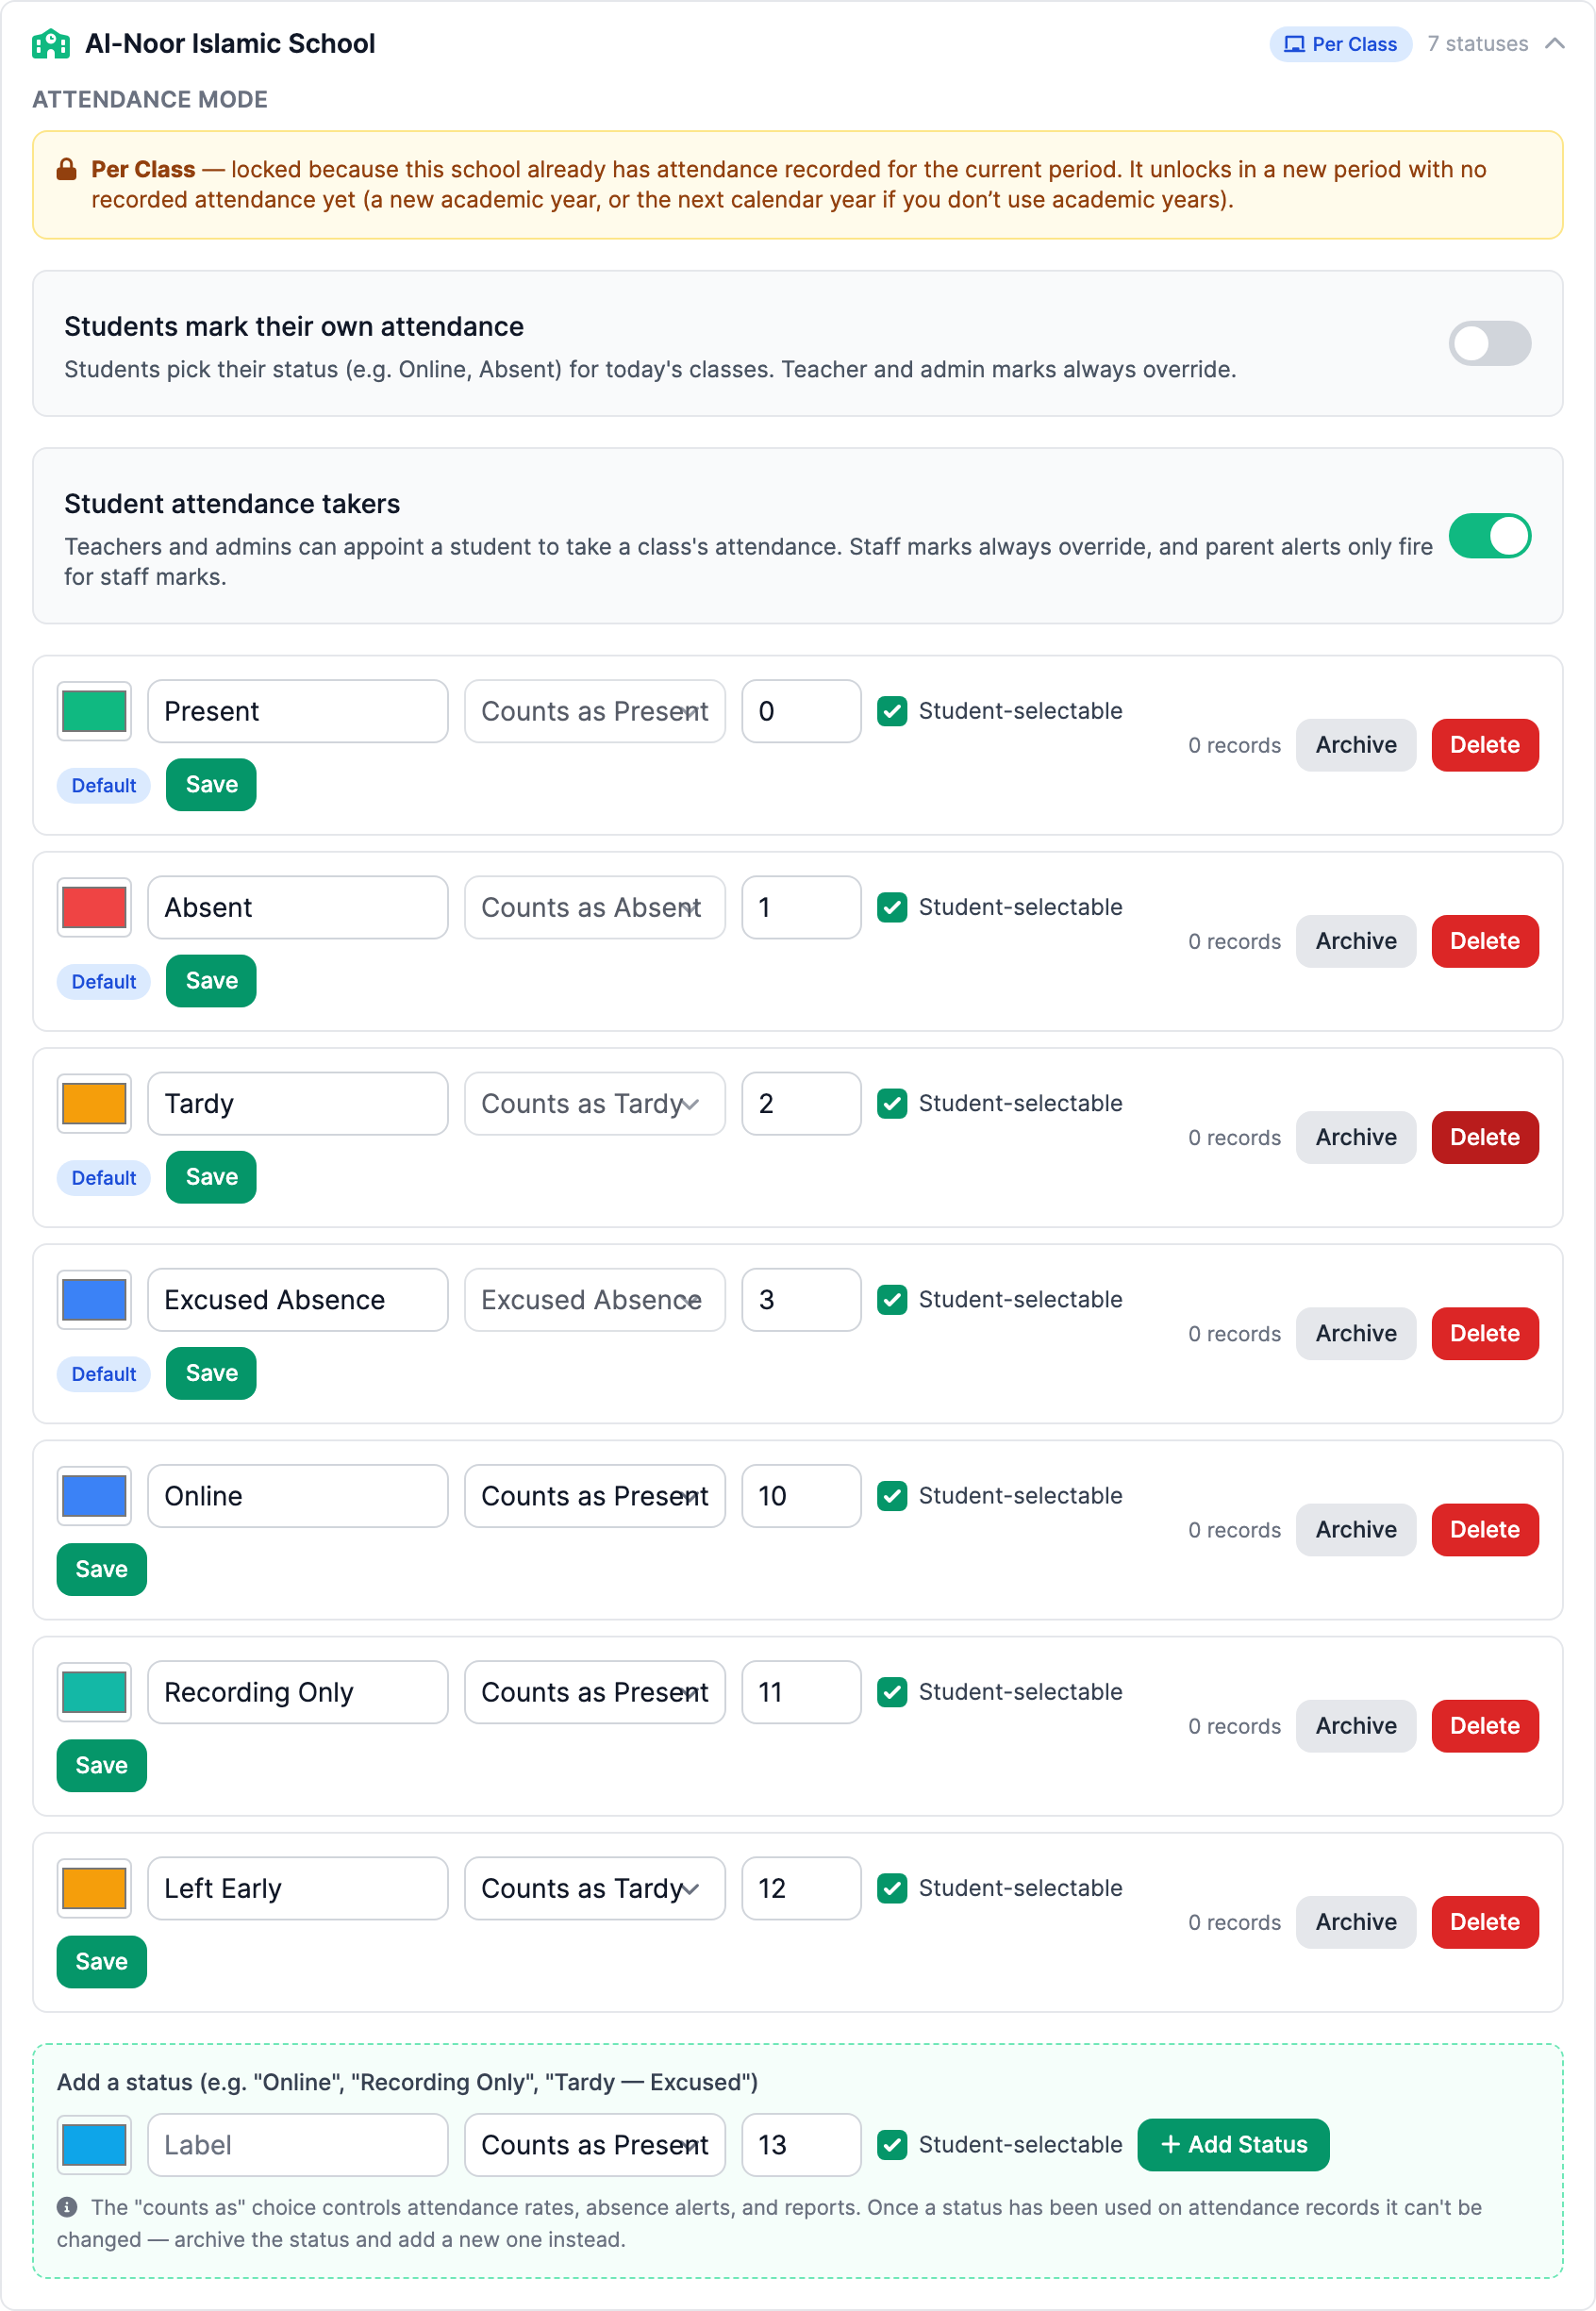
Expanding a school shows everything on one panel: its attendance mode (Per Class vs Daily — also shown as a pill in the collapsed row), the “Students mark their own attendance” and “Student attendance takers” toggles, and the school's status list with an add-a-status row at the bottom.
Why the mode may be locked
The attendance mode locks as soon as the school has attendance recorded in the current period, so history can't be re-interpreted mid-year. It unlocks again in a new period with no marks yet. The mode itself is covered in the daily attendance guide.
1. Custom attendance statuses
Every school starts with four defaults — Present, Absent, Tardy, and Excused Absence (marked with a blue Default pill). You can add your own on top: “Online”, “Recording Only”, “Left Early”, or anything your school uses. Statuses are per school, so your weekend program and your full-time school can use different sets.
Add a status
- Expand the school and find the Add a status row at the bottom of its panel.
- Pick a color and type a label (e.g. “Online”).
- Pick the “counts as” category — the base status the new one behaves as for attendance rates, absence alerts, and reports. Choose from Present, Tardy, Excused Absence, Excused Tardy, or Absent. “Online” typically counts as Present; “Left Early” might count as Tardy.
- Set the order number (where it appears among the marking buttons) and decide whether it's student-selectable — whether students may choose it when self-marking.
- Click Add Status.

The “counts as” choice locks once used
The base category controls attendance rates, absence alerts, and reports. Once a status has been used on real attendance records, its “counts as” can't be changed — that would silently rewrite history (the row shows “In use — category locked”). To reclassify, archive the old status and add a new one. The four defaults never change category.
Archive vs delete
A status that has never been used can be deleted outright. Once it has attendance records, it can only be archived — it disappears from the marking options going forward, but existing records keep their label and color, and you can Restore it later. Each row shows its record count so you know which case you're in.
2. Student self-marking
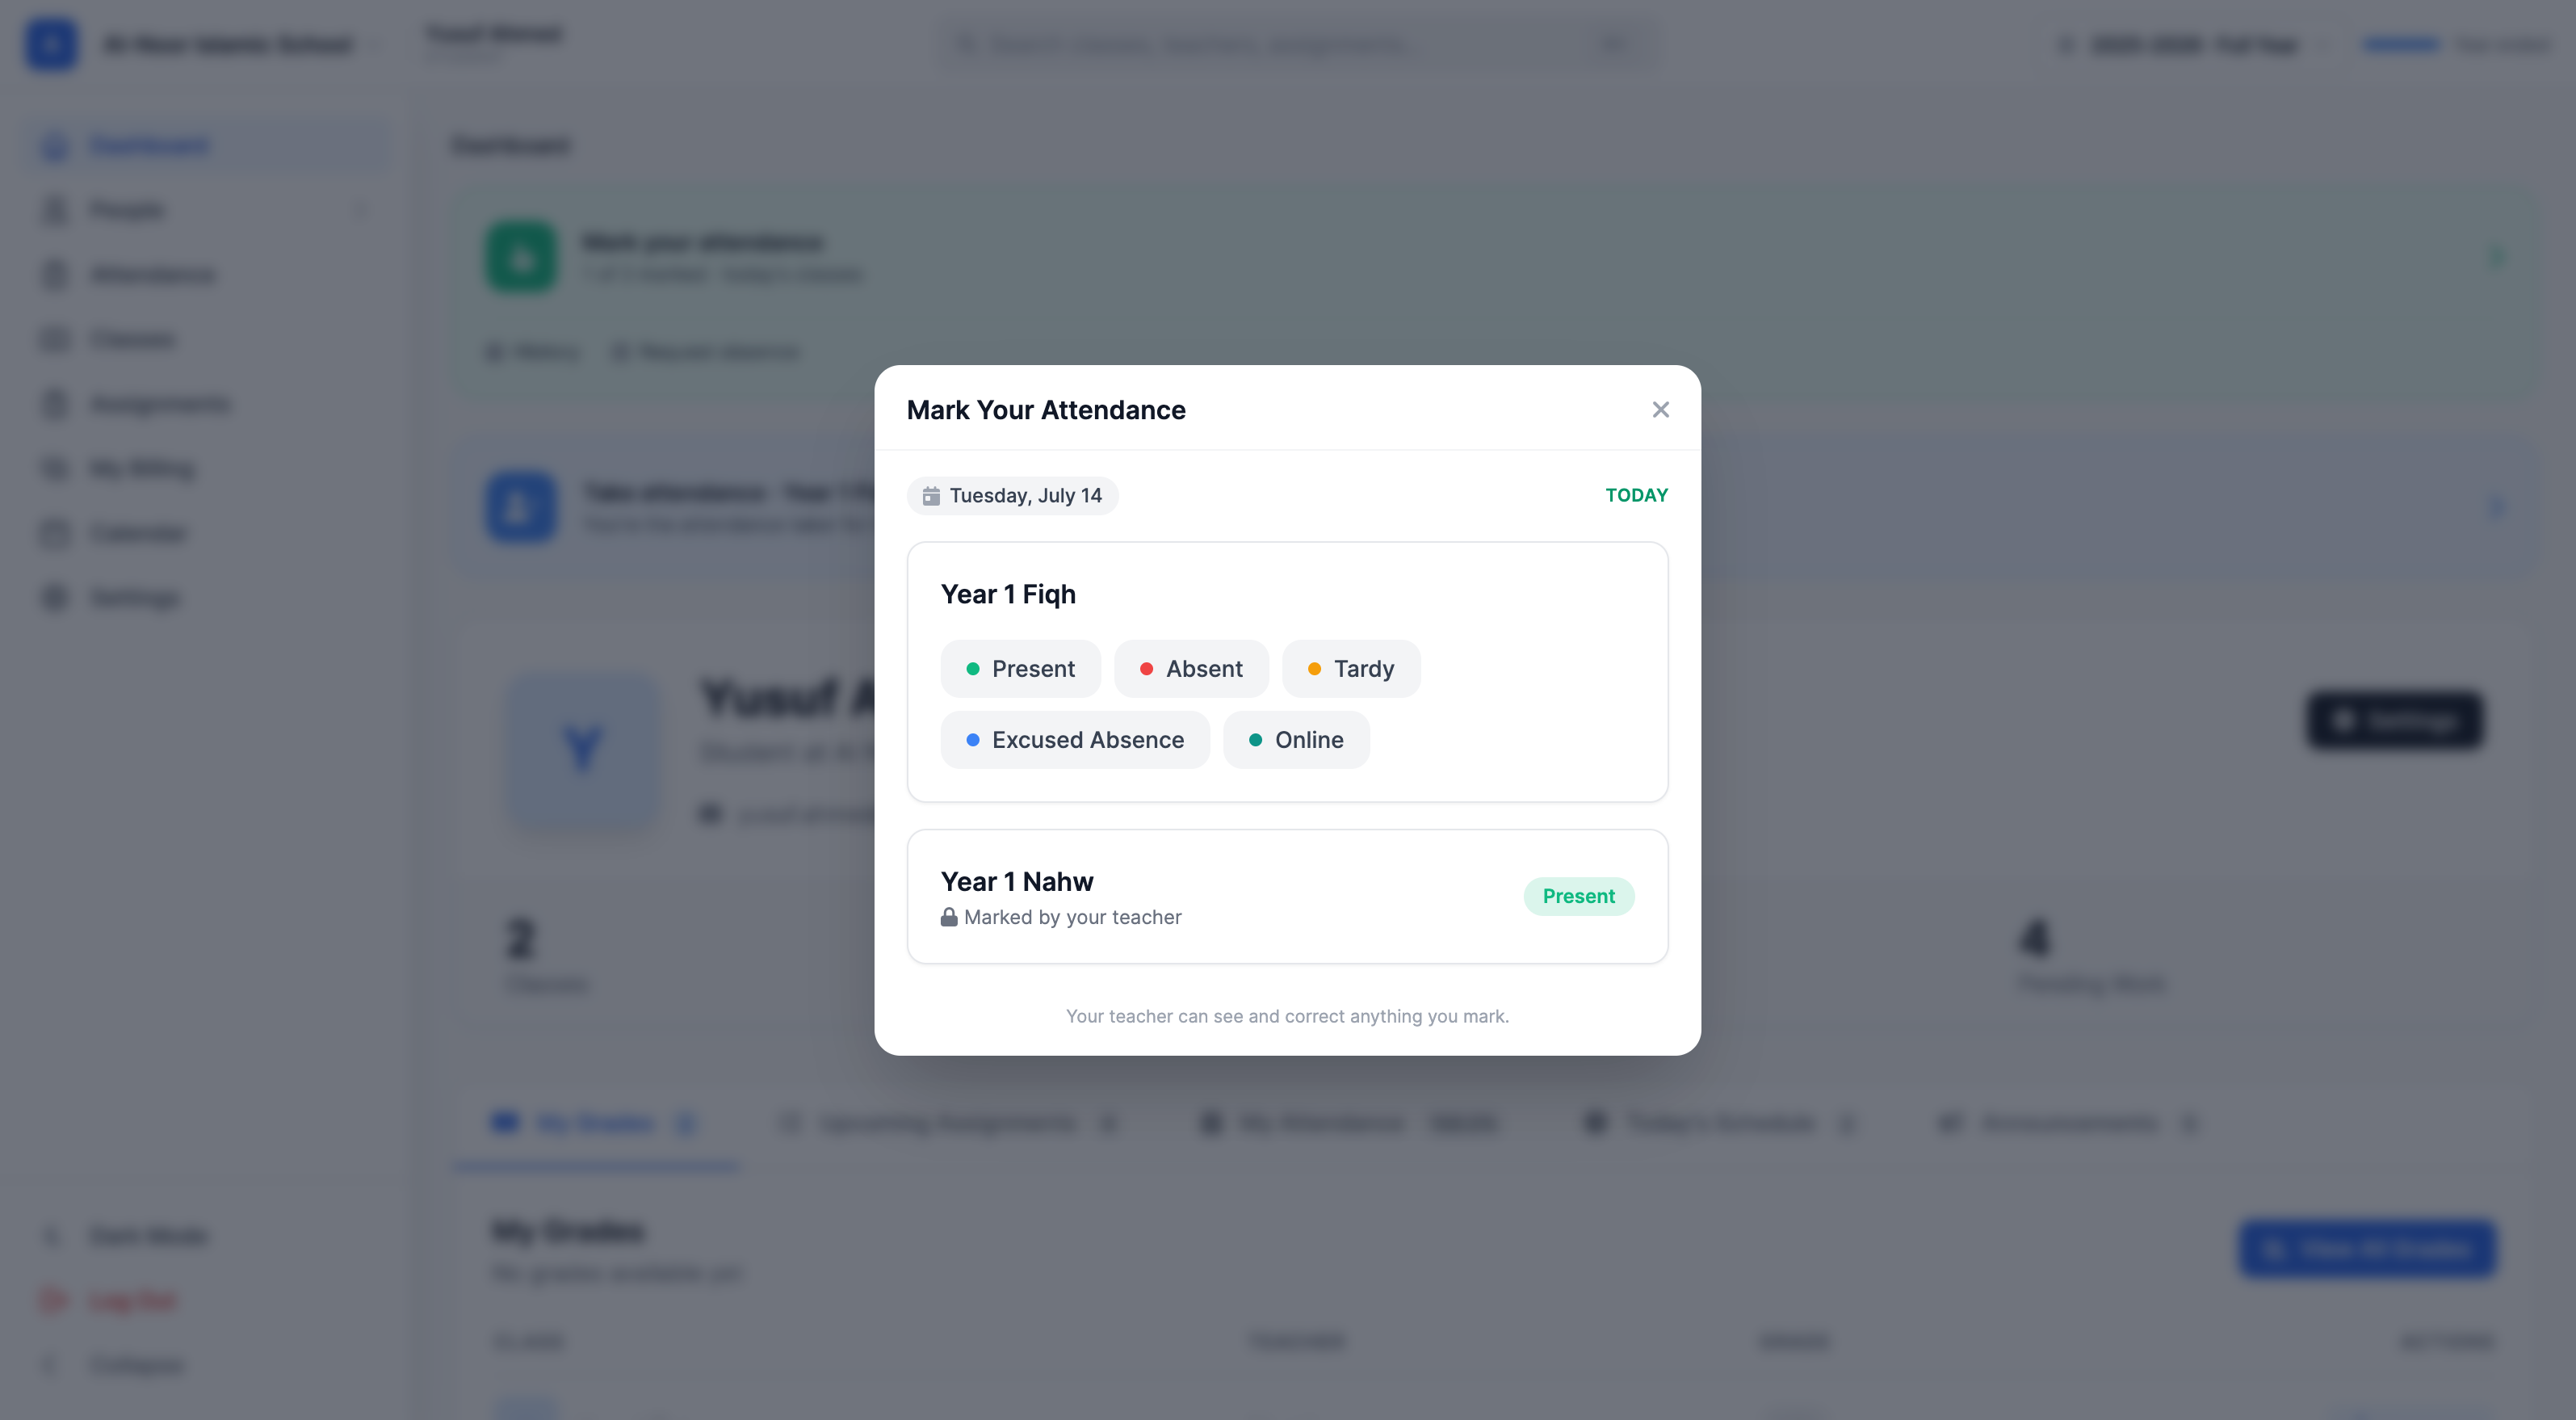
Turn on “Students mark their own attendance” for a school and students with their own login get a Mark your attendance card on their dashboard. It's trust-based: students record how they attended each of the day's scheduled classes, choosing from the statuses you marked student-selectable. By default that means today only, but you can open a backdating window so students can also fill in days they missed.
What students can and can't do
- Today by default. Out of the box students can't backdate; the date is always today in your school's timezone. Set “Let students log earlier days” (next to the toggle) to a number of days and students get Previous day/Next day controls to step back within that window — never into the future, never past a locked term, and never onto a day their class doesn't meet.
- Their own classes only, and only classes that meet that day.
- Only student-selectable statuses. If you didn't mark “Absent” student-selectable, they can't self-mark absent.
- Staff always wins. The moment a teacher or admin marks a student, that class locks for the student (“Marked by your teacher”) — and staff can correct any self-mark at any time.
Daily-attendance schools
If the school uses whole-day (daily) attendance instead of per-class, the student's view becomes a single “School Day” entry titled “Today's Attendance” — they mark once for the day.
3. Student attendance takers
Sometimes you want a responsible student to run the register — the teacher is out, or you simply delegate it. Turn on “Student attendance takers” for the school, then appoint a student per class.
Appoint a taker
- Open the class's attendance grid (Attendance → pick the class).
- Click Actions → Attendance Takers (the menu item shows a blue badge with the class's active taker count).
- Choose a student. Only students with their own MarkTrack login can be appointed — the taker signs in to mark.
- Optionally set a From / Until date window (say, just the week the teacher travels). Leave both blank for a standing appointment.
- Click Appoint Taker.
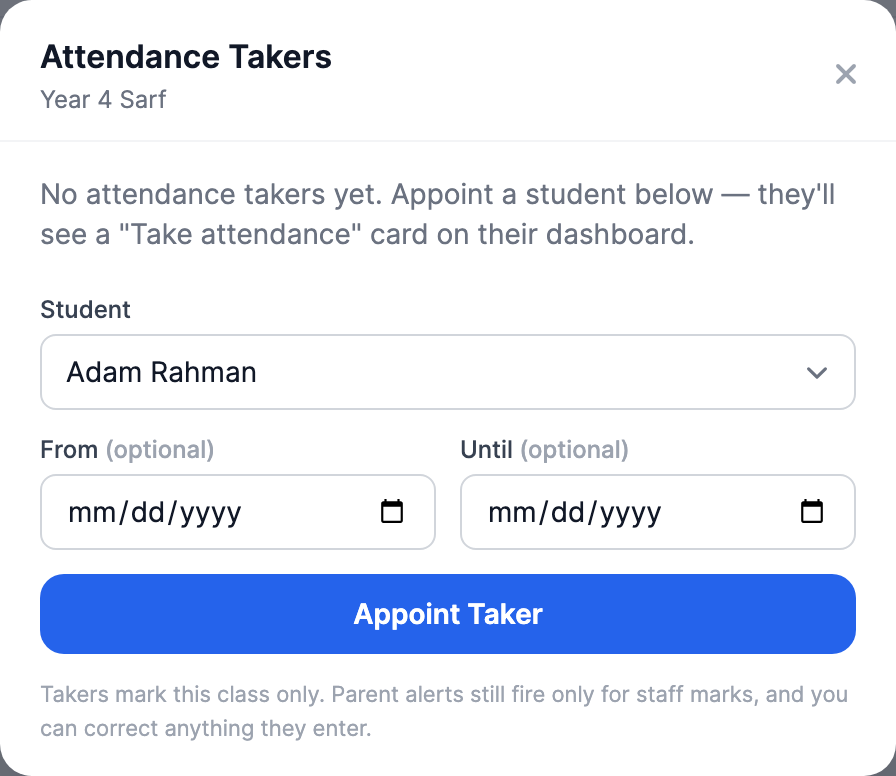
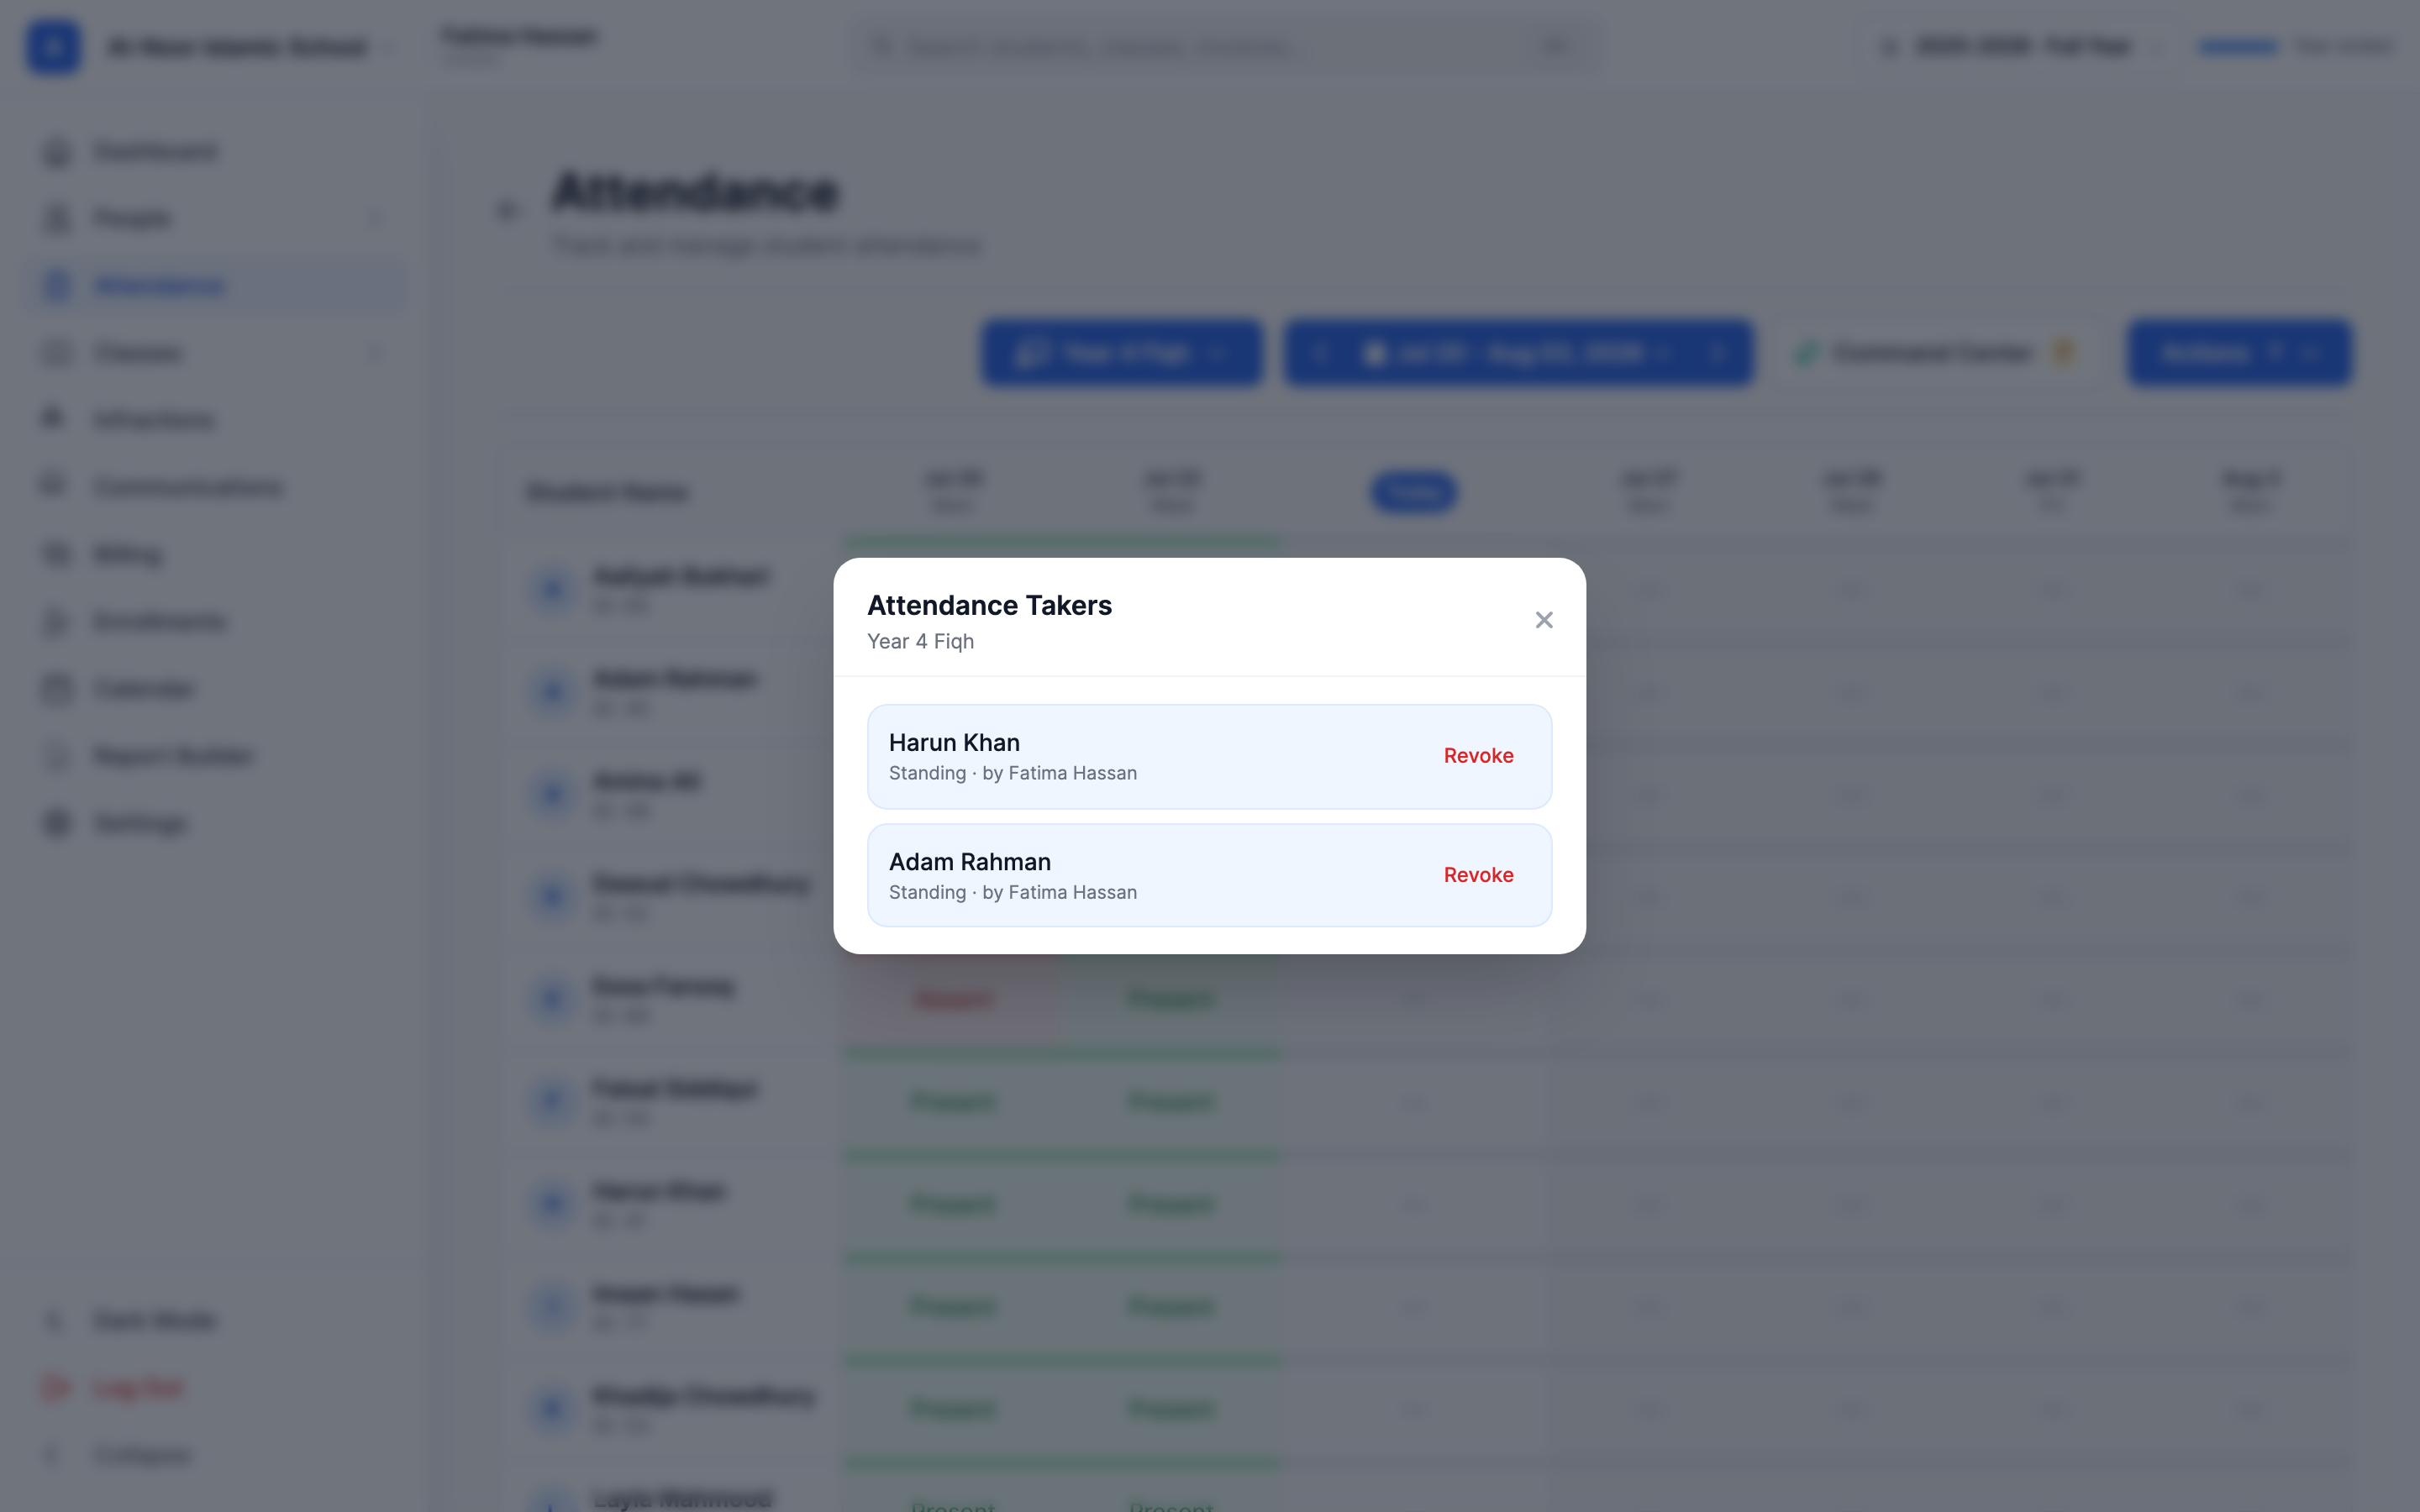
The same modal lists everyone currently appointed — with their window (or Standing) and who appointed them. Admins can appoint on any class in their schools; teachers only on classes they teach. To remove a taker, click Revoke — it takes effect on their very next action.
4. What the taker sees
The appointed student gets a “Take attendance” card on their dashboard that opens a purpose-built register: today's roster with the same status buttons staff use (including your custom statuses), and nothing else.
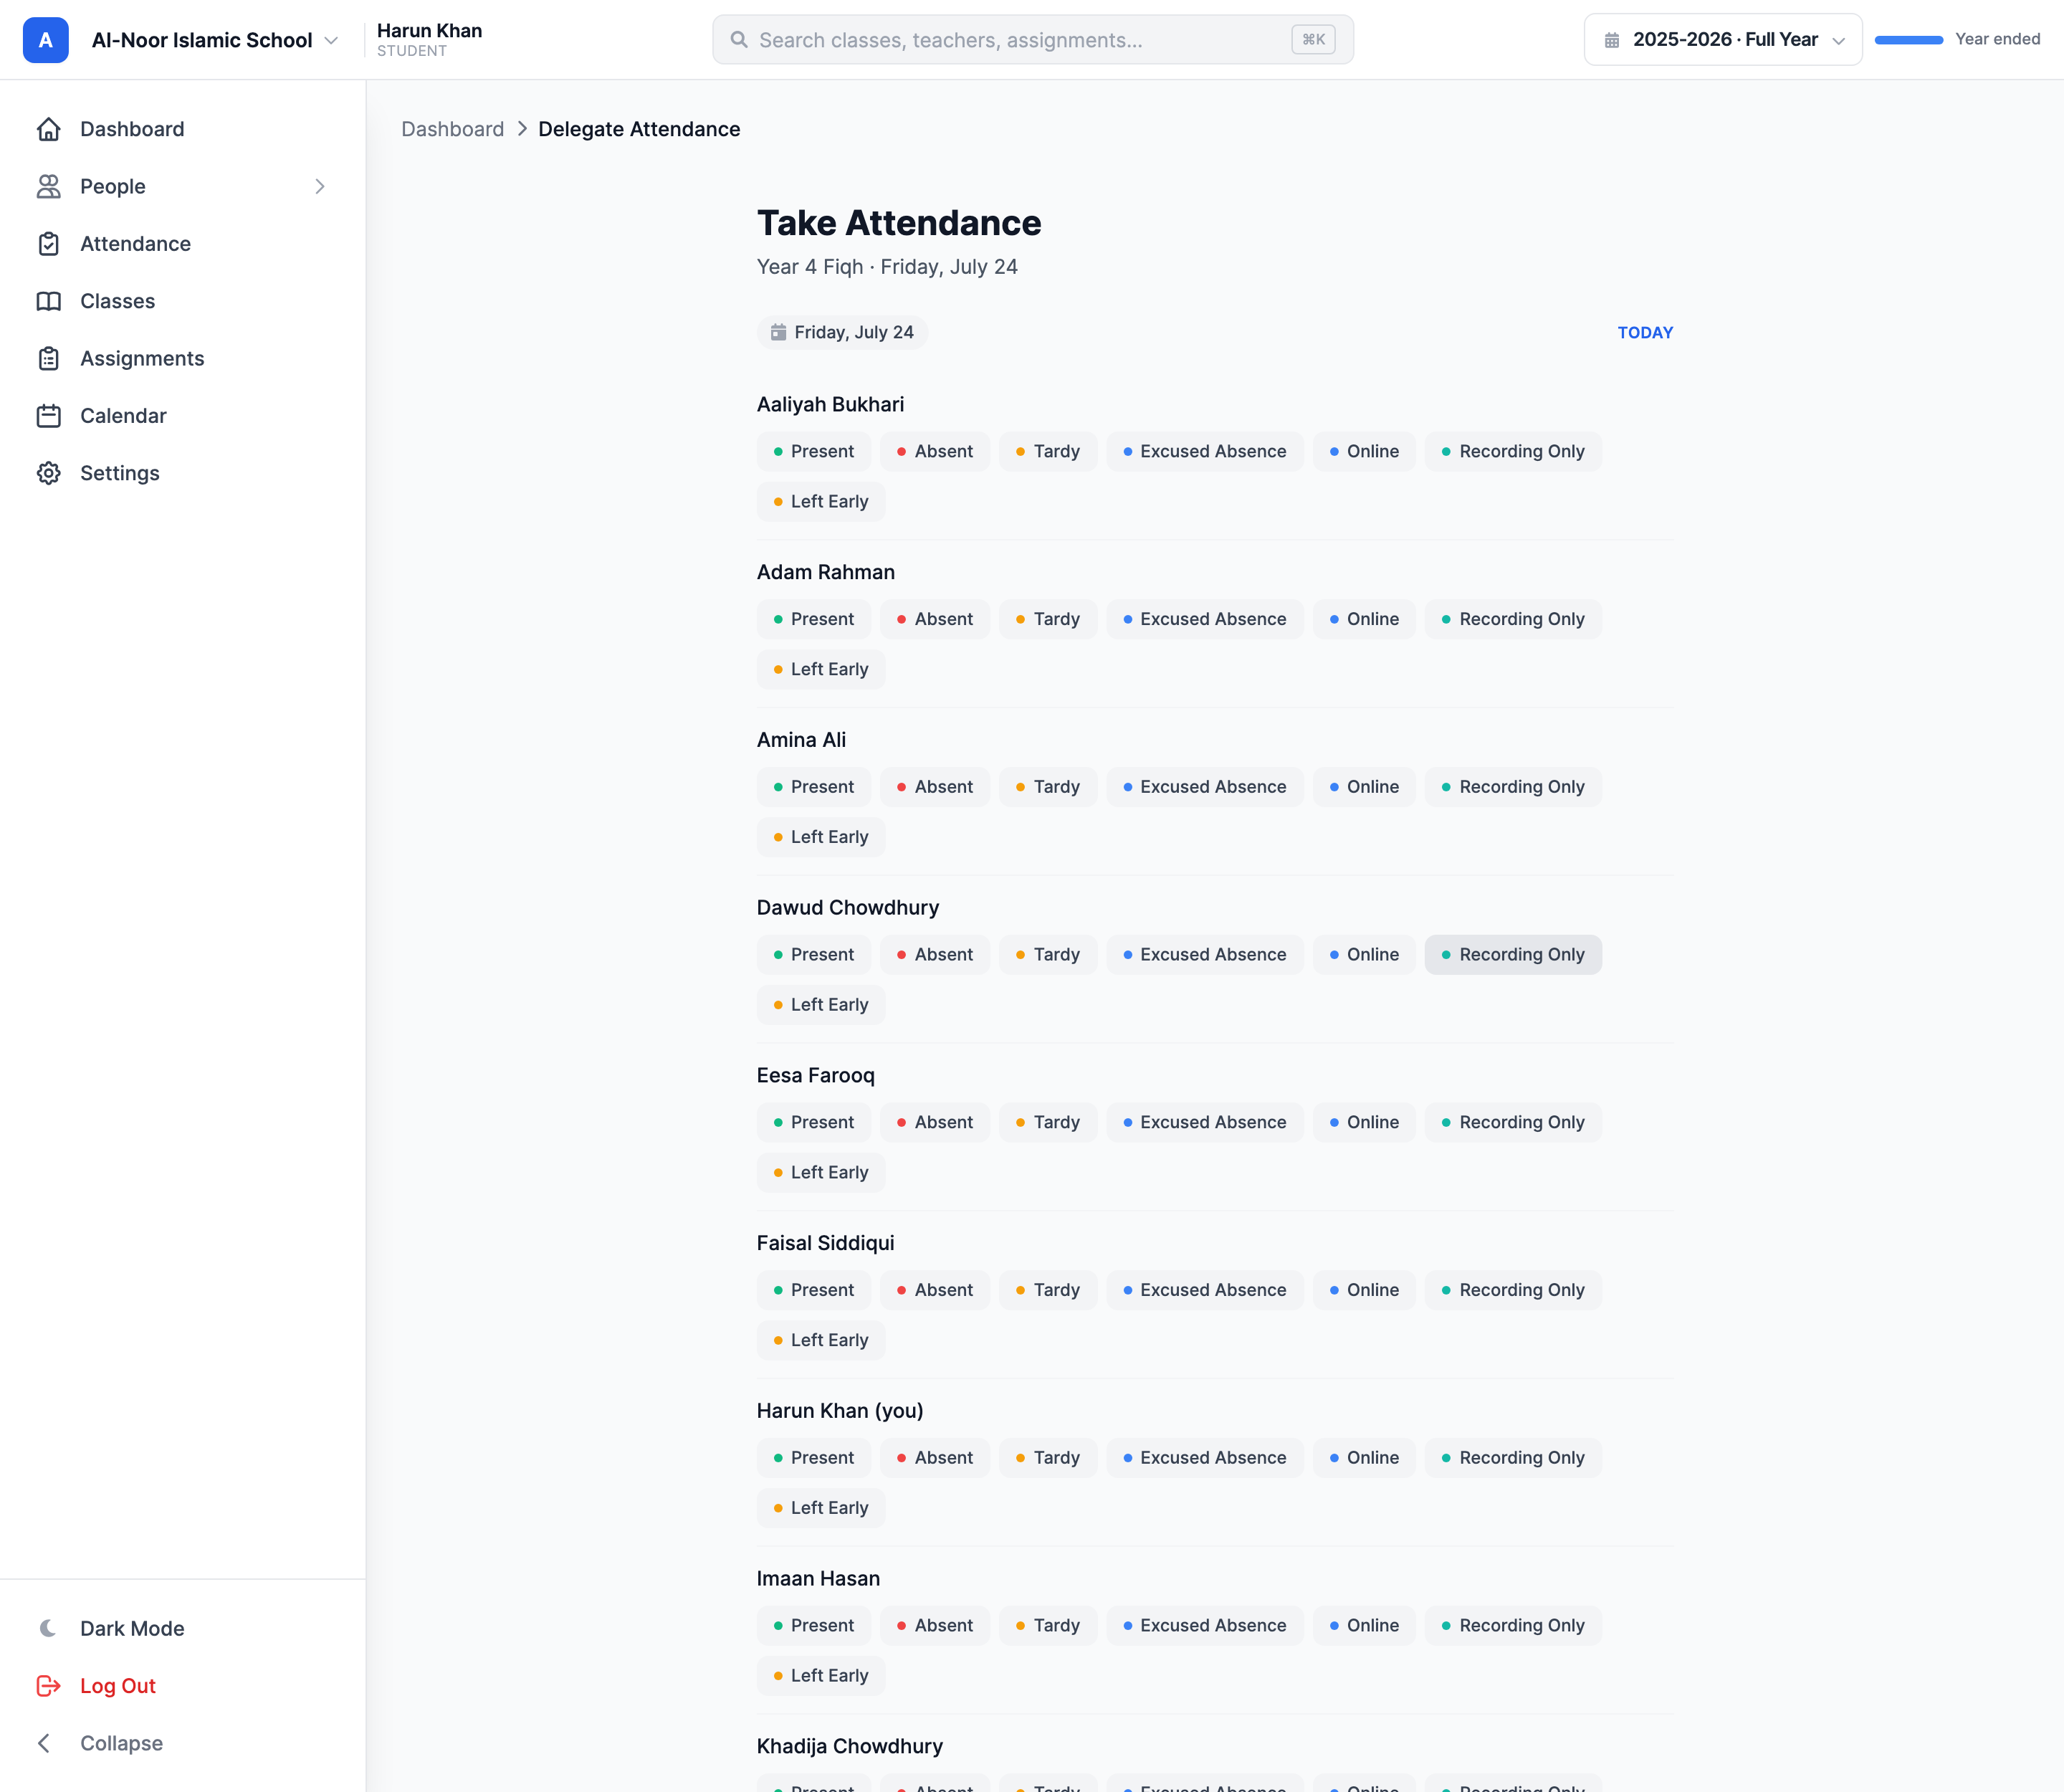
- Their one class only, today only — the register includes the taker's own row, flagged (you).
- Can't override staff. A row a teacher or admin already marked is locked to the taker (“Marked by a teacher”); staff can rewrite anything a taker enters.
- No notes, no history, no exports — just marking.
- Daily-mode “School Day” classes can't be delegated (that roster is the whole school).
5. Who marked each student — provenance
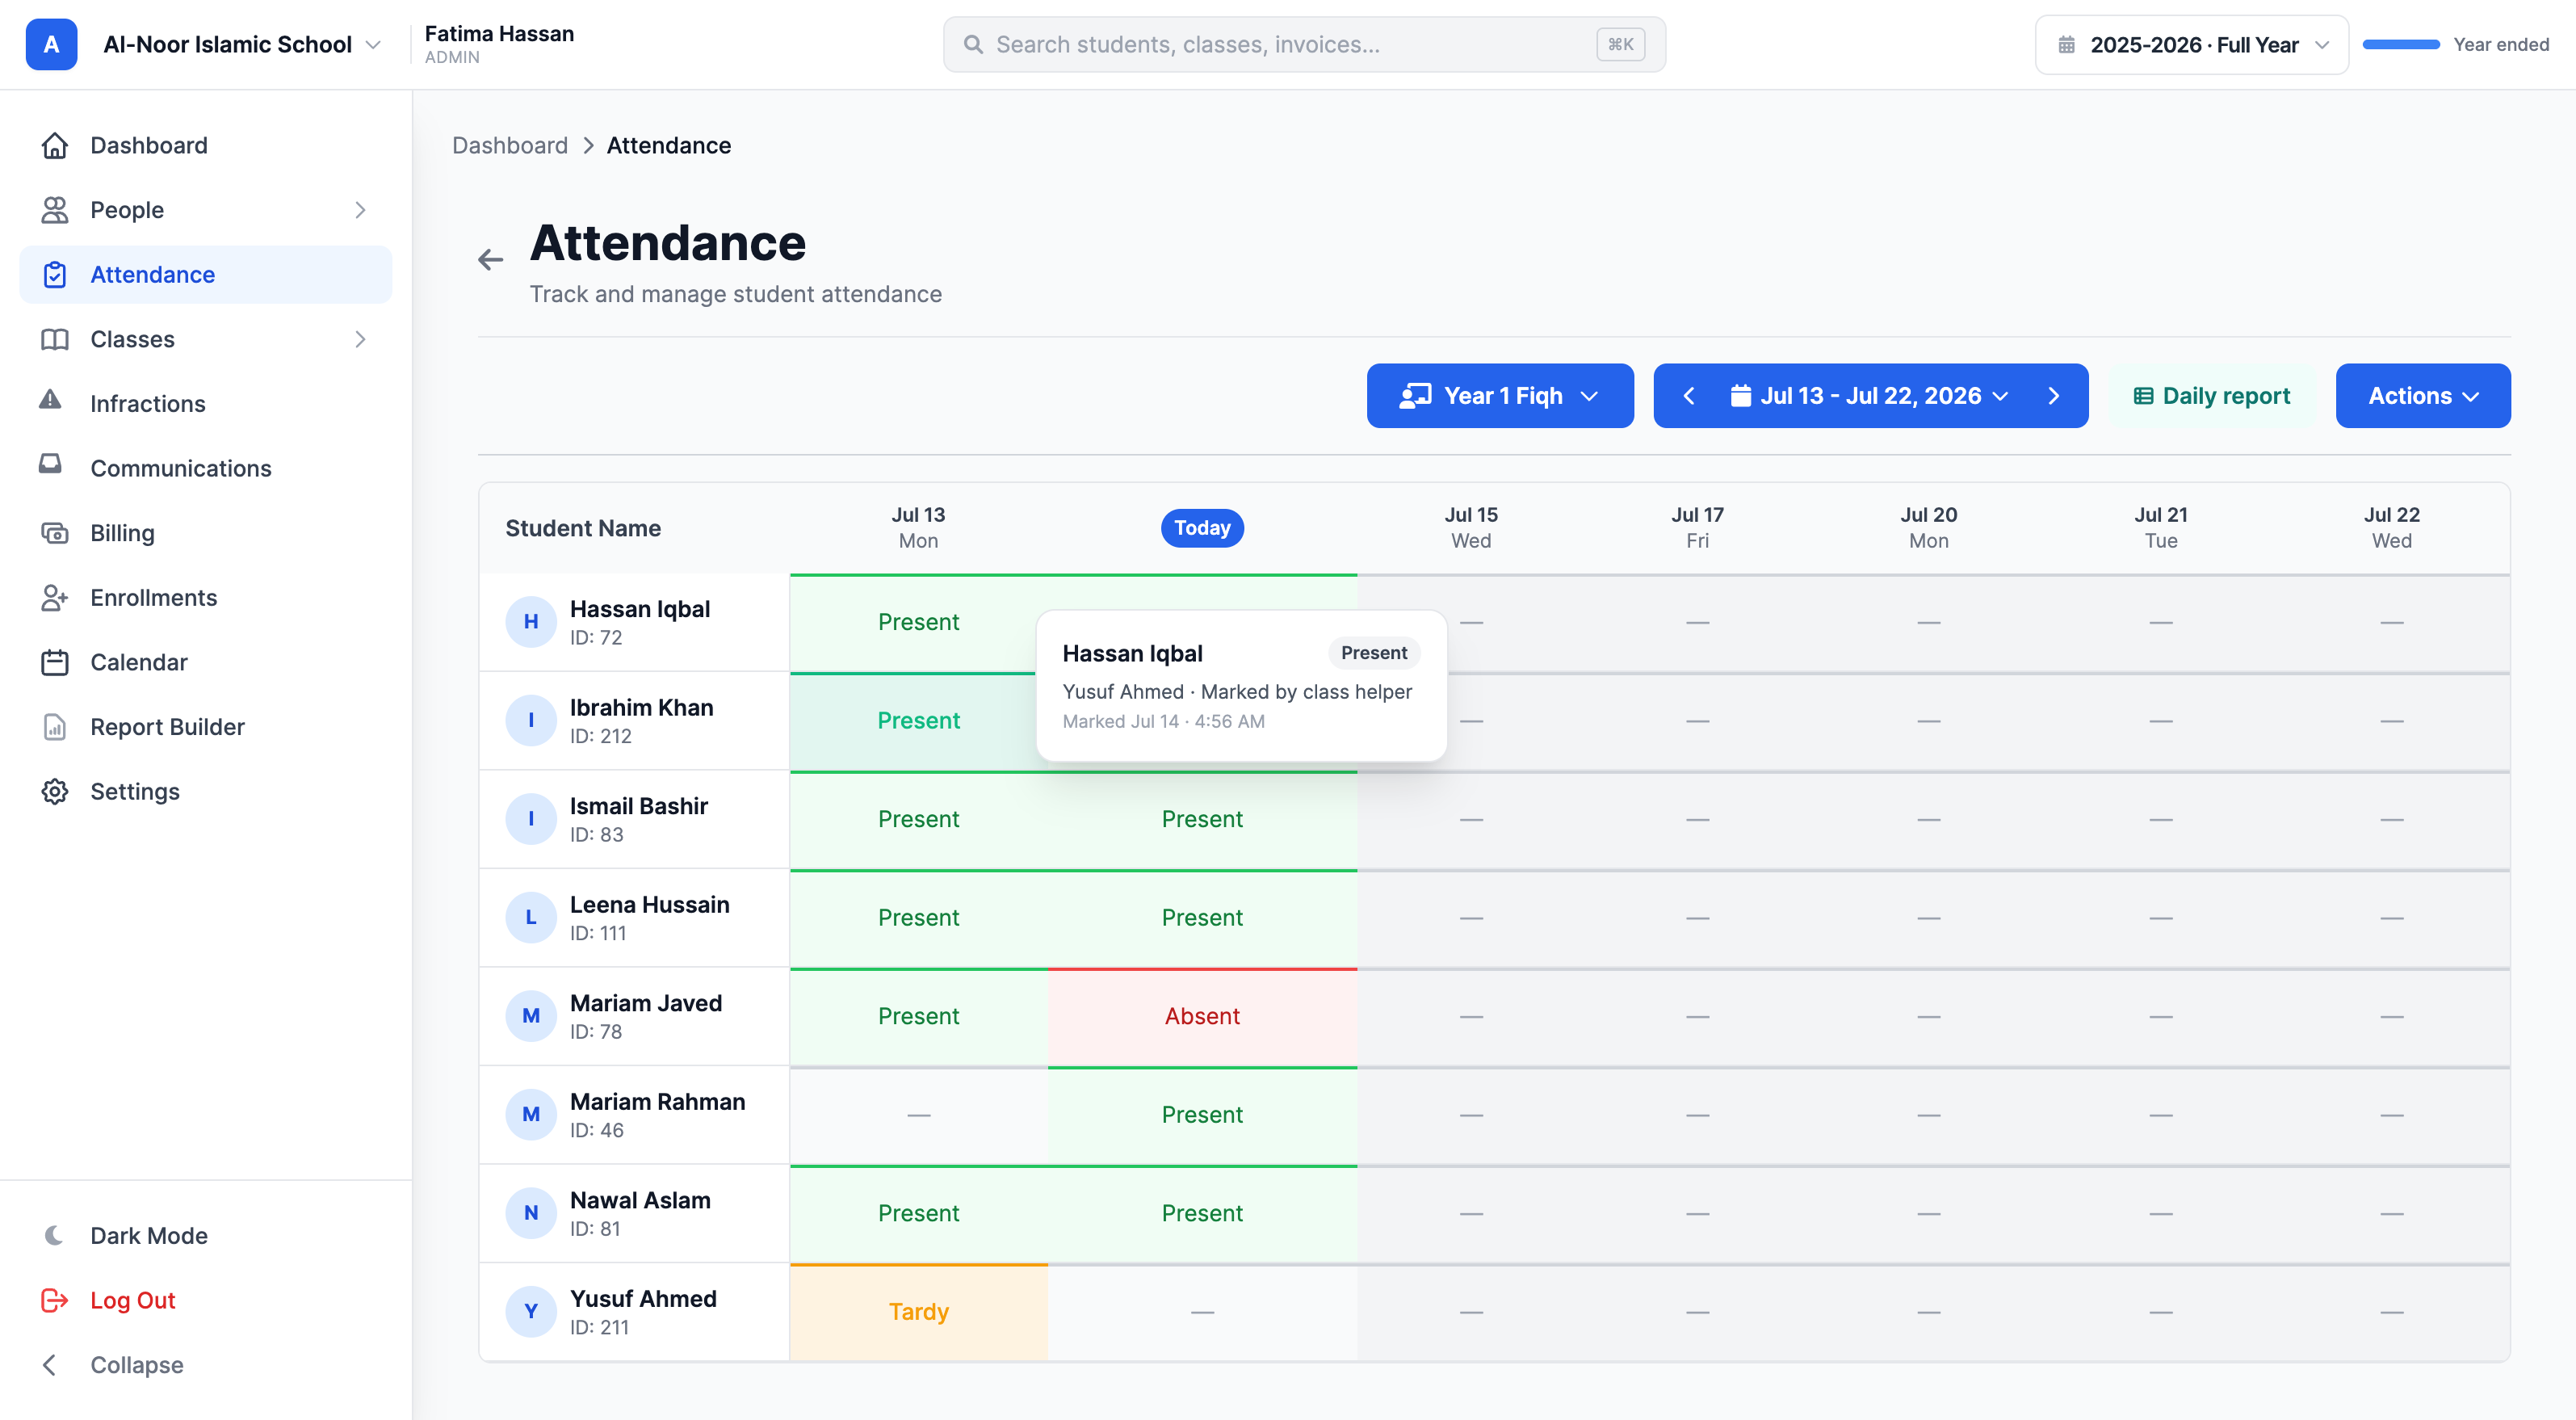
Whenever someone other than staff marks a student, the grid shows a small dot in the cell's corner:
- Teal — the student self-marked.
- Blue — a class helper (attendance taker) marked it.
- Hollow ring — staff corrected a non-staff mark.
Plain teacher/admin marks show no dot — the grid stays clean. Click a dot for the full detail: who marked it, in what role, the exact time, and for corrections, which kind of mark was replaced.
Privacy
Only your staff see who marked a student. Parents see no marker at all on the web, and in the mobile apps families get a neutral role label (“Class helper” / “Self-marked”) — never another student's name. Students reviewing their own history get a “Marked by me” filter and a note when staff corrected them.
Parent alerts stay staff-only
Alerts fire only for staff marks
A student self-marking absent, or an attendance taker marking a classmate absent, does not alert parents. The alert waits until a teacher or admin confirms the absence. This is automatic — no configuration needed.
Configuring the alerts themselves (statuses, email vs SMS, timing) is covered in the attendance alert guides in the Attendance category.
Related
- Take daily attendance — the grid itself, attendance modes, and class reports.
- Absence requests — how families report absences ahead of time.
- Set your timezone (and why it controls attendance) — what “today” means for self-marking and takers.
More in Attendance
Still stuck?
Our team is happy to walk you through it.